Wednesday, June 19, 2013

Homeade Marshmallow Brownies

Hey everyone!
Amanda here.

Today I'm sharing one of my all-time favorite dessert recipes, Marshmallow Brownies!


 For the brownies you will need:

  • 1/3 C. Cocoa
  • 1 1/2 C. Flour
  • 2 C. Granulated Sugar
  • 2 tsp. Vanilla
  • 3/4 C. Butter (one stick and a half)
  • 1/4 tsp. Salt
  • 4 Eggs


For the frosting you will need:

  • 1/3 C. Cocoa Powder
  • 1 1/2 C. Powdered Sugar
  • 1 Stick of Butter (1/2 C)
  • 1/3 C. Evaporated Milk


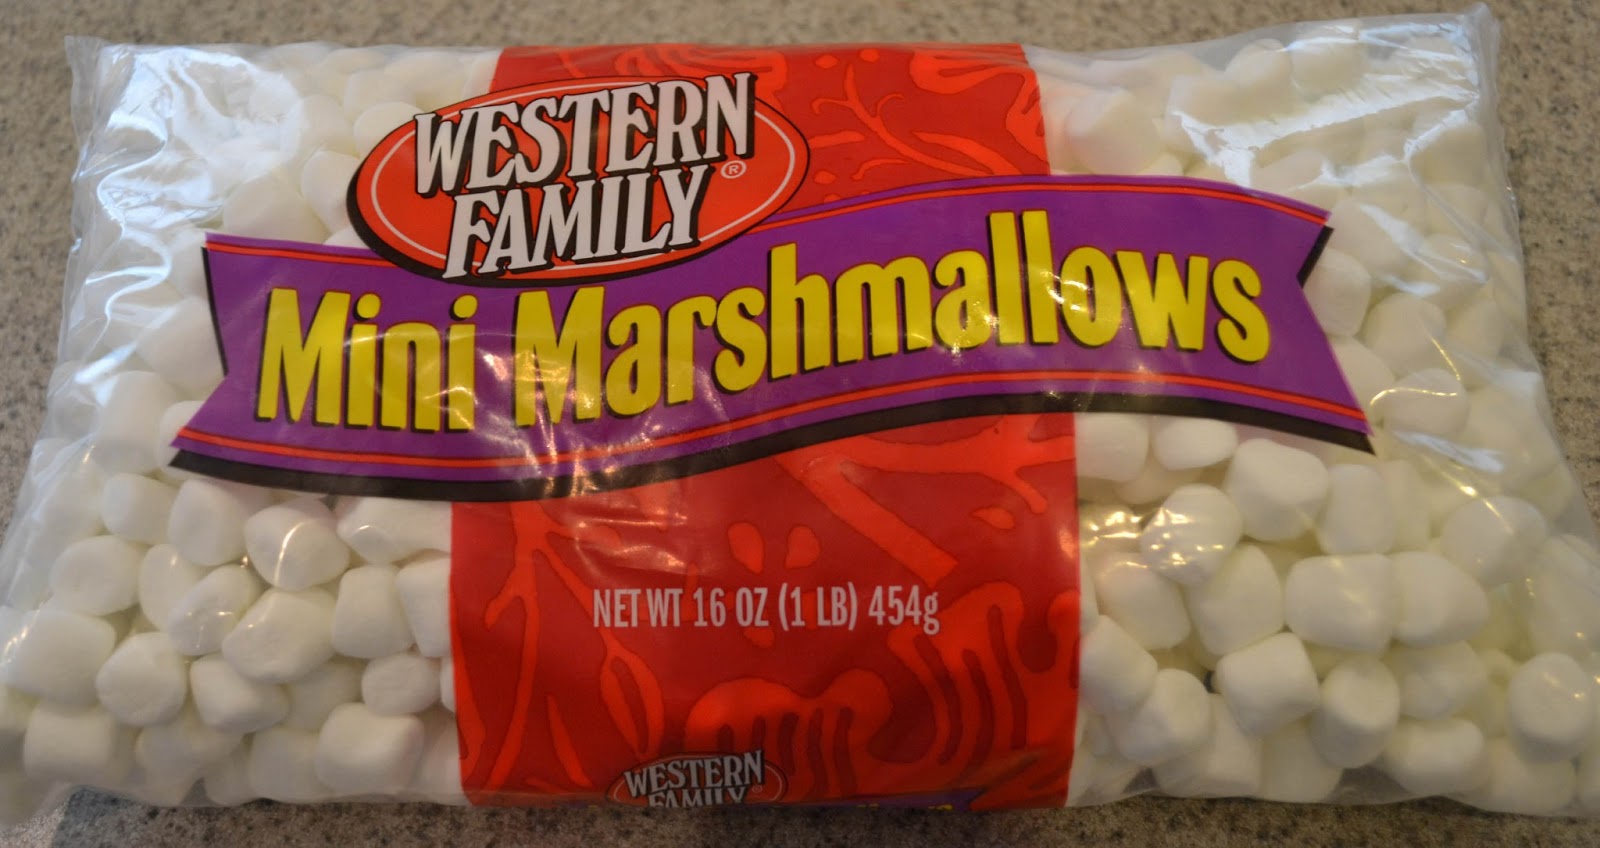
And of course, marshmallows!


Let's get started!

Step 1
(Preheat your oven to 350)

Mix all of the brownie ingredients together...


...until it looks something like this.


Step 2
Spray a jelly pan with non-stick spray


Step 3
Pour the brownie dough onto the jelly pan and spread it evenly over the surface....


...until it looks something like this.


Step 4
Put the brownies in the oven at 350 for 20 minutes.

Step 5
When the brownies are done...


...put a bag (depending on the brand, it doesn't need a whole bag) of marshmallows on the brownies right after they are out of the oven. Keep the oven on (for now, anyway).


Put the brownies and marshmallows back in the oven for 3 minutes. Turn the oven off.


Step 6
Get the brownies out of the oven after 3 minutes. The marshmallows should be very puffy.


Step 7
After waiting a couple minutes for the marshmallows to cool, add the frosting/glaze.
The recipe for the frosting is pretty simple - add the ingredients listed above at the beginning of the post
-Mix all the ingredients together. Make sure the frosting isn't too thick.


When the frosting is done, pour it evenly on the brownies and spread it.


It should look something like this when it's done.

Next, just leave it to cool for a while, cut, and enjoy!

Here's a picture of the recipe- just to make it easier to print off and use!


Enjoy! (:


Monday, June 17, 2013

2 Loads of laundry -- no soap!

Yup. I had a mental moment.

I'm blaming it on the blog post that consumed most of my morning. That, and having a fairly new washer that has a fancy-pantsy steam clean function that I tried for only the second time this morning.

So there I was, trying to get the socks and underwear load really, really clean and sanitized, and I run the batch without soap. Which I didn't realize until over 2 hours later. That's right -- the steam/sanitize function takes TONS of TIME -- over 2 hours! And for some reason as it was running, the machine experienced a blip that caused it to stop and display an error message. So I go into the laundry room, irritated to be drawn away from the day's important blog post, and figure that it's just easier to start the batch over on the regular cycle that only takes 40 minutes.

Not until that cycle finished and I was transfering the wet socks to the dryer did I realize that neither batch had detergent in it.

Yup. I ran two batches of laundry (2 cycles) without a lick of detergent.

Must be Monday.

DIY Cute Hanging Make-up Storage


Christie writes:

Above is the purple hanging storage piece that inspired this entire project. Notice that I didn't say it was cute. That's because it belonged to Amanda and hung in her closet in her room that is yellow and gray. And it's definitely purple. Which clashes with yellow and gray. Amanda just couldn't take the purple anymore and asked if I could make something similiar to the purple piece but in bedroom-matching colors. It looked easy enough, so I said YES. 

I'm happy to report that I did it! It worked. It turned out. It's even cute. (It's posted at the bottom of this entry.) But it wasn't super easy. If you're new to sewing, this is not the project for you. Experienced seamstresses only. (BTW, how do you correctly refer to a male who sews? Is he a seamster? Leave your thoughts in the comments.)

Here are the fabrics that we used for this project. I used about 1/3 yard of the gray fabric to make continuous double-fold bias tape by hand. I'll post a future how-to on that, but would recommend that you not make your own double-fold bias tape. (It took a lot of time, and it's fairly cheap to purchase.)

The main section of the project is double sided. Each unsewn piece was 24" wide by 43" long. If you use the same fabric front and back, you'll need 1 1/3 yards of fabric. Using two different fabrics, you'll need 2/3 of a yard of each fabric.

I used a yellow plaid flannel for the back, thinking it would be a nice soft surface to have hanging against the inside of Amanda's closet door. (No scratching off of paint.)


Next you'll need some clear vinyl. I purchased mine a few years ago when I was re-doing the seat cushions on our outdoor patio chairs. You can usually find it at a fabric store and can purchase it by the foot. (You'll need two feet of it.) My vinyl was 54" wide. If you'd like to save money and have recently purchased a new bedspread or blanket, you can use the clear vinyl from a couple bedding bags.

Cut six vinyl strips that are 3 1/2" tall and 24" wide. These are for the top six rows. I made the bottom row pockets a bit deeper. I suggest cutting two of them that are 6" tall and 24" wide.

Once you have your double-fold bias tape, your fabric measured and cut, and a total of 8 vinyl strips, you're ready to get started.


 Step 1) Sew the bias tape along the top if each strip of vinyl using coordinating thread in a straight stitch. The vinyl is sandwiched between the folds of the bias tape.This step gives the finished product a crisp and durable edge for the pockets.


Step 2) Once you have sewn bias tape along the tops of each strip of vinyl, you're ready to start sewing the strips of vinyl to the front fabric piece -- right-side up. (See photos above.)

Start with the bottom pocket (6" tall) by carefully pinning it in place, aligning your pins vertically in the seam allowance so that you're not creating any holes in the vinyl that can be seen once the project is finished.

I sewed the vinly strips to the front fabric along the bottom of each vinyl strip 1/8" in from the bottom of the vinyl using a straight stitch in thread that coordinated with the front fabric (yellow). Once I'd sewn the bottom of the piece of vinyl, I'd also tack the top edge of the vinyl to the front fabric in the seam allowance on each side. I found that this helped to hold the vinyl in place better than just the bottom seam.

I left about 1/2" betweent the top and bottom of each row.

This step if the most difficult one of the entire project. Go slowy. Be patient. As you progress upward, sewing the vinyl strips onto the front fabric, you will probably need to roll the right-hand side of the project as you continue sewing the vinyl strips on. After a few rows, you will want to sew the vinyl strips on with the top part of the project on the right -- like I'm doing in the bottom photo above.


Step 3) I'm a perfectionist, so at this stage of the project I found it helpful to remind myself that it was okay if each row of vinyl wasn't perfectly aligned. Mine looked a little wavy at this point. I simply told myself that since it would be haning on the back of a closet door, it didn't need to be perfect, and I took a few deep breathes.

Now for the easiest part. Decide how many loops you want to hang your project by. I decided three loops would be good. Four would also work nicely. Multiply how many loops you'll use by 4 (inches). Now cut that many inches of the double-folded bias tape and sew a straight seam down the open side as close to the edge as you can. (I skipped sewing my bias tape closed, and it's niggling at me.)

Now cut 4" lengths of the sewn bias tape for each loop. Decide where to place your loops at the top of the front piece, and pin the loop to the front side of the fabric like the photo above.


Step 4) The end is in sight. Stay with me. For this step you'll be arranging the project with the front and back fabric pieces right-sides together. I laid the front piece on my table with the vinyl side up, and then draped the back piece over it, wrong-side up. Next, I pinned the two pieces together. Pay particular attention as you pin the sides and bottom, as you don't want to create holes in the vinyl that will be seen. I pinned between the vinyl rows on the sides, and horizontally in the seam allowance on the bottom.

You can round your corners at this point. I used a saucer from the kitchen to trace a nice rounded edge, and then cut off the excess. You can also decide to keep the corners square.

IMPORTANT: Mark off an 8" opening that will NOT be sewn along one of the sides. This is how you will turn your project right-side-out once you've sewn it together.

Carefully sew around the edges of the project in a straight stitch leaving a standard 5/8" seam allowance. Be sure to leave an 8" opening on one side. Once I sewed around the edges, I trimmed the edge leaving just over 1/4" of fabric/vinyl. Note: DO NOT trim the fabric/vinyl at the 8" opening.

Now you're ready to turn the project right-side-out using the 8" opening. At this point it's important to reach inside and firmly press outward on the seam -- especially at the corners. After doing this, I folded in the seam allowance at the 8" opening and sewed it closed close to the edge and continued sewing carefully around the entire edge of the project.


Step 5) It's time to use a dry-erase marker and make the vertical lines for the pockets. Be sure not to mark on the fabric or thread -- just the vinyl. We left the middle of the bottom row unmarked so that it would create a nice big pocket.

Once you have the lines marked, sew straight seams just to one side of the dry-erase line. (Note: If you sew right on top of the dry-erase line, it won't perfectly erase. Oops. I found out the hard way.)

The sewing segment of the project is done!


We hung our project using Command hooks, being careful to follow the directions on the package exactly.


Viola! There it hangs in all its glory. Whew!


Friday, June 14, 2013

Make Cute Cards from Thrift Store Books

Christie writes . . .

Everyone loves to get a cute, handmade card! The cards to the left are all cards that I created using white cardstock, scrapbook paper, and pictures taken from books I bought at my local thrift store.
Last year I read an article in my local newspaper about the book, A Simple Act of Gratitude: How Learning to Say Thank You Changed my Life. It inspired me to set my own card-writing goal for that year -- to write and send five notes every week for a year's total of 260 cards. I didn't quite make my goal, but I did send 201 handwritten notes in 2012.

I found that my favorite cards to send were the ones I'd created from cut-out photos I found in second-hand books. Best of all, the cards are quick and easy to make, don't cost a lot, and can make someone smile before they even read what you wrote inside.
                                                                               My very favorite second-hand books to use for making cards are photo gift books. Check out the photos to the left. They're all from a photo gift book I bought for less than a dollar and then cut apart. I especially like creating cards from gift books because they're small and have hilarious pictures in them.
 
Old yearbooks also can be used to make great cards. If the yearbook you'd like to use is precious to you, simply copy/scan the page that the photos you want to use are on -- no need to ruin a perfectly good yearbook. You can also opt to use yearbooks from anonymous strangers, like I do. The yearbook to the left is an old Utah State University Buzzer yearbook that I purchased at Deseret Industries. A clipping of the graduates in the caps and gowns would make a terrific graduation card!

Finally, when you're searching for used books to make greeting cards from, be on the lookout for books full of photographs. Old Guinness World Records books are particularly good, as they're full of strange and wonderful photos.

Please share your favorite sources for making fun greeting cards in the comments below.

Sunday, June 09, 2013

Ice Cream Sandwiches; With a Waffle Iron and Cake Mix

We were experimenting in the kitchen tonight. With cake. And a waffle iron. We were making 3 2 1 cake, which turned out to be gross. Don't try it. Then, Natalie came up with the brilliant idea to make ice cream sandwiches with cake mix. So! Here are step-by-step instructions on how to make them - we'll give a review afterwards.

Step 1
Get some cake mix, any kind will do.
We used some cake mix Natalie received for her birthday. Just follow the directions that are on the box for ordinary cake. However, after we mixed the cake and made the first sandwich pieces, our cake tasted like eggs. So, we added cocoa and sugar to try and get rid of the egg taste. It ended up working for us!


Step 2
Heat up your waffle iron/maker. When it is heated up, pour the cake mix onto the hot plate.


Step 3
Once the cake mix is completely cooked (it needs to be a little bit crispy so it doesn't fall apart), take it out carefully (Natalie and I had to use 2 forks and a spatula) and let it cool.


Step 4
Break the waffle apart, we broke it into fourths, and put some ice cream on top of it.


Step 5
Eat it. 


Review
Natalie and I thought these were okay, but they weren't anything special. They were fun to make and experiment with, and we might make them again, but only out of summer boredom.


Comment below if you find any ways to make this treat better!

Thursday, June 06, 2013

Organize Jewelry with Screens

BEFORE:

This is how I stored my necklaces before I figured out a better way.

Note that they're simply hanging on a child's hanger. Getting a necklace off is not fun. It entails correctly selecting the strand you want and hoping that it doesn't get tangled with all the other necklaces hanging on that side. Yuck.

I'm happy to report that I found a much better system. It's customized, simple, and it keeps everything from tangling.

AFTER:


What you're seeing are window screens with drapery hooks inserted to hold necklaces and bracelets. Earrings that have french hooks can simply be slipped directly into the screening.

There are many great things about this system. First of all, it's customizable. I had space by the light switch in my walk-in closet where I wanted to hang jewelry and another spot on the side of my built-in shoe organizer. I did some measuring and figured out that three 10 by 18 inch screens would fit perfectly. I simply had my local glass and window shop --  Bennett's Glass -- make them. (See details on screen specs below.)

The next great thing about this system is that you can hang matching jewelry together making it easy to mix and match your accessories with your outfits. Now instead of looking in three different places for necklaces, bracelets and earrings, I can just go to one place to find them all!

Finally, this system is completely removable. Because I attached the screens with 3M - Command Velcro strips, I can temporarily take the screens down to rearrange the hooks. If, for some reason, I wanted to take them down permantly, I could. The strips are especially made to be non-damaging and removable from both the wall and the frames. Cinchy!

HOW TO MAKE JEWELRY SCREENS:


  1. Figure out where you could hang a jewelry screen. Tip A) I would NOT put them on the back of a door. That's too much movement and might damage the finish on your door and/or jewelry. Tip B) Horizontal spaces maximize the amount of jewelry you can hang. I feel like the screens placed vertically on the side of my shoe organizer were a little more difficult to organize than the horizontal screen above my light switch.
  2. Decide on the size of screen you'll need. Your local window/glass shop will need the outside measurement to make your new screen. Tip A) Make sure that you get the screen(s) made with metal mesh -- NOT fiberglass. The metal will hold up better with the drapery hooks and weight of jewelry.  Tip B) If you're looking to save money, try to scavenge for pre-made screens. My three screens cost roughly $15 each. But you might be able to find ready-made screens at garage sales, estate sales, farm sales, and possibly thrift stores.
  3. Purchase drapery hooks and Command velcro strips. When you're ready to hang the screens up, carefully follow the printed directions on the velcro strips to the letter. (It worked great for me!)
  4. Before attaching the screent to the velcro on the wall, insert the drapery hooks first -- sharp end first. And, yes, the hooks are going to bend/displace the wire mesh a little bit. But it's just a one-time thing. I have some fairly heavy necklaces, and although the hook makes a bit bigger hole upon insertion, it hasn't gotten any bigger with days of haning.
  5. Enjoy!

Paperclip and String Earrings

This is an update on how the paperclip earrings turned out.

They didn't.

I followed the directions -- even super-glued the ends of the unbent paperclips together. But those ends of the paperclip were what ended up being the problem. They didn't stay glued.

Oh, and as I was wrapping the paperclip in the navy blue crochet thread that I'd chosen, I kept thinking to myself. Wow, this is taking forever. This may be a really cheap craft, but my TIME is worth something.

Then, as I was about 2/3 done with wrapping the first paper clip in string, the ends that I'd super-glued together broke, making the string uneven and frustrating me. I admit it, I'm a perfectionist. I thought about finishing the earrings, but that broken superglue bond bugged me. And I didn't see a sure-fire way around it, so I trashed the paperclip earrings.

Based on my progress on the first one, it wasn't going to be something that I wanted to wear, let alone a gift I could give to someone else.


Fortunately, the Asian Chicken Broccoli Slaw turned out much better.

I can't eat broccoli uncooked, so I sauteed the broccoli slaw and sliced green onions prior to adding the sauce. In retrospect, I'm pretty sure that cooking the broccoli slaw made it a little less appealing to my family initially. My husband asked, "What's this?"

That's not really what I like to hear when presenting a new dish to the family.

Fortunately he tried it, liked it, and happily ate it for dinner.

And the recipe isn't lying when it says the sauce is yummy. I loved it!

Wednesday, May 22, 2013

Summer Pinterest Projects . . .

I'm just thinking out loud here. Don't hold me to this, but . . .

To make this summer fun and interesting I'm planning to make one recipe from Pinterest every week and also try one project idea from Pinterest. Whadayathink? Crazy? Over-reaching? Do-able?

The Paperclip and String earrings  are my first project, and I've already unbent my paperclips and the ends are super-gluing together as I write. (No fingers glued together this time. Yeah!) I'm going to make them using navy blue cotton crochet thread and Elmer's glue that I already have on hand. Ditto the earring findings -- I'm a closet jewelry maker. The net cost to me? Nada.

When I get them finished, I'll post photos, tips, etc. Until then you can check out this site for how to make them yourself.


And now for the first recipe I'm going to try. . .
 -- Asian Chicken Brocoli Slaw --
Saw it on Pinterest today, made up the grocery list, and plan just one itty, bitty change before serving it to my family. . . . I'm going to quickly stir-fry the broccoli slaw in a little sauce before combining it with the rest of the ingredients. (My stomach doesn't like raw broccoli.)

Again, I'll let you know how it turns out.

And, just in case you haven't seen me face to face in a while, I have a new motivational phrase for getting through life's ups and down . . . "Muddle Through."

Sound familiar? It's from a famous Christmas carol, "Have Yourself a Merry Little Christmas." It perfectly sums up what life is like most of the time. And, hey, who says muddling can't be fun? That's going to be my own unique spin to muddling . . . FUN! (Someone has to put the fun in dysFUNctional.)

Sunday, March 10, 2013

March Menu

Here's what's for dinner in March -- just the main dishes. (Unless the menu is lie.)

3/9 -- Steak and oven-baked fries
3/10 -- Oven-baked chicken pasta
3/11 -- Curry rice and vegetables
3/12 -- French toast
3/13 -- Loaded potato soup with breadsticks
3/14 -- Date night (forage)
3/15 -- Home-grilled hamburgers
3/16 -- French dip sandwiches
3/17 -- Crockpot pork roase with veggies (cabbage?)
3/18 -- Green Chili stew (w/ leftover pork)
3/19 -- Homemade pizza w/ green beans
3/20 -- Spicy Thai noodles w/ freezer corn
3/21 -- Date night (forage)
3/22 -- Taco salad
3/23 -- Stew-cube stroganoff over rice or noodles
3/24 -- Crockpot Tortilla Soup w/ bread
3/25 -- Baked potato bar
3/26 -- Grilled cheese sandwiches
3/27 -- Little smokies in a blanket w/ green beans or salad
3/28 -- Date night (forage)
3/29 -- Rice Mexicalli
3/30 -- Pasta alfredo

Thursday, July 19, 2012

Seeing the Sights in Northern Utah


If you visit my neck of the woods the week of August 13th - 18, here are some of the things that I'd love to introduce you to!


Of course there is more to see, but these are the highlights that must not be missed!

Can't wait to see you here in Utah!

Wednesday, June 27, 2012

Doing something to get healthy makes me happy!

Getting off dead center. Walking with a buddy. Tracking what I'm eating. Logging it all on SparkPeople. Feeling in control.

These are the things that have made me a very happy woman today.

Oh, and painting the white tips of my fingernails in red and blue polka-dots in honor of the 4th of July.

Have a great day!

Tuesday, June 26, 2012

I Just Joined SparkPeople . . .


In my efforts to get healthy, I joined SparkPeople. I first heard about it through a doctor, and although I didn't use it when she recommended it, I'm going to use it now to:


  • track the food I eat.
  • track the fruit and veggie servings I get each day.
  • log the glasses of water I drink in a day.
  • post the workout activities and minutes I do.
  • STAY MOTIVATED!
If you'd like to find me there, my username is: ChristieHansen. Because it IS my name.


Tuesday, June 19, 2012

How a friend can make all the difference

I have a strange and unusual compulsion to analyze what's keeping me from being content and happy. And for the past few months, it's been my weight.

I'm at an all-time high. More than I weighed at full term with any of my pregnancies. Blech!

I know that happiness shouldn't be centered on what the scale says, but knowing something and feeling something are not the same thing. I feel fat. And it niggles at me throughout the day, eating away at my happiness.

Ever since I started teaching school two years ago I've fallen out of the habit of regular exercise. I know I need it, it helps me feel better, energizes me, and yet I still haven't made it a part of my routine.

Until yesterday.

I've finally found an exercise buddy! And it's making all the difference.

As part of my analysis on how to get healthy and happy, last week I jotted down some of my biggest obstacles -- the things that are stumbling blocks for me when it comes to fitness.  They are:


  • Sugars -- once I have a taste of sweet, I'm left wanting more. And more. And more.
  • Boredom eating.
  • Managing my environment -- having treats around the house.
  • Succumbing to the "I'm taking a break" mentality
  • Making excuses.
  • Not having an exercise buddy.
  • Ignoring and/or overriding hunger signals.
  • Eating too fast.
  • Multitasking while I'm eating.
  • All or nothing thinking.
Of all those challenges, I instantly saw one I could do something about -- not having an exercise buddy.

Sunday after church I cornered Susan. (This spring as I was driving to work before 7:00 AM, I'd often see her walking along my road.) "Susan," I said, "would it be possible for me to join you on your morning walks?"

Fortunately, she said yes.

We meet to walk at 6:00 AM -- a time I wouldn't normally see without having made a commitment to meet Susan. We walk and gab, and gab and walk. And before we know it, we've got our hour in and it's time to head home. I love it!

I can let myself down, turn off the alarm and go back to sleep. But when I've said I'll meet up with a friend, half the time I'm up even before my alarm goes off.

Aren't friends wonderful?!

Thursday, June 07, 2012

Who were you at 12 or 13?

Ray Bradbury passed away this week. (Tuesday, May 5, 2012) In my newspaper this morning there was a write up about him. I read it with interest and a little melancholy, but one thing stuck with me -- a quote of his from 1982:

"The great thing about my life is that everything I've done is a result of when I was 12 or 13."

This stayed with me for a couple reasons. First, I teach 12- and 13-year-olds. And we do a brief science fiction unit each year and read a few of Ray Bradbury's short stories. I thought the quote would be perfect to work up into a display during our sci-fi unit.

Second, I really do believe that there is something important that happens at 12 or 13. It's an age when kids are  past childhood, but not quite fully into adolescence. It's a time when they know what they like and what they don't like, and they're dreaming about the future. I deliberately chose to teach 7th grade students because I like that age of kids. They're malleable, flexible, intelligent and ready to laugh.

Ray Bradbury's quote had me thinking about myself at 12 or 13. We moved from our house in Hyrum to live with my Kofoed grandparents while my dad was building our new house. Looking back, I did things then that I still do now. I still write in a journal. I still mow the lawn and work in the yard. I didn't really enjoy cooking then, and I'm not enthusiastic about it now. I did craft projects, played the piano, and enjoyed looking through Country Living Magazine. I took long walks though the neighborhood and noticed landscaping techniques.

I can't completely say that "everything I've done is a result of when I was 12 or 13", but I'm certainly still the same person.

Friday, June 01, 2012

Yard Work Workout Boosts Mental Attitude

School's out for summer. (Humming the rock anthem that these words remind me of.) That means that my summer yard workout season is going to get underway.

I've noticed something about myself; perhaps it's true for you too . . . when I'm feeling blah, if I start doing something -- especially an outdoor gardening task -- I feel better in no time. Just being outside is a lift, but tackling some yard chore and being able to see immediate results gives my mental attitude a boost too.

The question is, if working in the yard lifts my mental attitude 100% of the time, why don't I spend more time doing it? And why don't I look forward to it? I think the answer is . . . because I'm human.

Friday, May 18, 2012

My Top 20 Book List

I'm a reader. Not much of a TV watcher, but I love reading!

Before I get to my top 20 book list, I'd like to make note of something that made me really happy this week. I discovered that one of our favorite family sayings has its origin in Shakespeare's "The Merchant of Venice." My dad is fond of saying, "It was so good I almost wet my pants."  In fact, the very first time my parents bought a brand new vehicle, Dad drove it home. When my mom asked him how he liked it, he said something like, "It's great, except for the seats."  My mom, wondering what's wrong with the seats, asked for clarification. "They're wet," he said. "I couldn't help myself. It was just so nice that I wet my pants." Of course he was joking, but now you know the "gold standard" for my family.

So this week as I'm reading in "The Merchant of Venice" Act IV, Scene I, lines 50 thru 53:

"And others, when the bagpipe sings i' th' nose,
Cannot contain their urine; for affection,
Master of passion, sways it to the mood
Of what it likes or loathes. . . ."

There you have it. Unable to contain urine because of affection. ("It was so good, I wet my pants.")

Christie's Top 20 Book List (20 fave books, not in exact order)
  1. The Unthinkable: Who Survives When Disaster Strikes - and Why, by Amanda Ripley
  2. The Killer Angels, by Michael Shaara
  3. Jane Eyre, by Charlotte Bronte
  4. I Am a Mother, by Jane Clayson Johnson
  5. Exodus, by Leon Uris
  6. 32 Third Graders and One Class Bunny, by Phillip Done
  7. The No. 1 Ladies Detective Agency (series), by Alexander McCall Smith
  8. Maisie Dobbs (series), by Jacqueline Winspear
  9. Team of Rivals: The political genius of Abraham Lincoln, by Dorris Kearns Goodwin
  10. The Guernsey Literary and Potato Peel Pie Society, by Mary Ann Shaffer
  11. Anne Frank: The Diary of a Young Girl
  12. The Penderwicks: A Summer Tale of Four Sisters, Two Rabbits, and a Very Interesting Boy, by Jeanne Birdsall
  13. Anne of Green Gables (series), by L. M. Montgomery
  14. A Long Way from Chicago and A Year Down Yonder, by Richard Peck
  15. Moonraker's Bride, by Madeleine Brent
  16. The Story of My Life, by Helen Keller
  17. Pride and Prejudice, by Jane Austen
  18. Gift from the Sea, by Anne Morrow Lindbergh
  19. The Adams-Jefferson Letters: The Complete Correspondence Between Thomas Jefferson and Abigail and John Adams, by Lester J. Cappon
  20. Stargirl, by Jerry Spinelli
Keep in mind that I'm always reading a book. This list ebbs and flows.

Friday, May 11, 2012

This and That

Hey. I'm actually posting something. Wonders never cease.

Actually, I've been posting stuff, just not on this blog. I now have two other blogs. They are:

7thGradeLanguageArts.blogspot.com -- where I post stuff from school

HappinessAtEverySize.blogspot.com -- where I post stuff about finding happiness in my own skin.


If you're looking for a list of books to keep your tween or teen reading this summer, check out my students' recommendations for this year. Every year I ask them to write down their five favorite books of all time. These are the results:

Favorite Books for Girls

Favorite Books for Boys

I'm always reading books too. One of these days I need to post my own top 20 book list. But I have to compile it first. That may take a while.

Happiness is . . .

Here's what made me happy today:

In my Monday Update email to parents of my 7th grade language arts students I asked parents who were interested to donate items in 3s for each class's Reading Reward Drawing. The response has been terrific! Today alone I had three students bring in motivating donations for the drawing.

While my students in 5th hour were working on their fast fiction assignment, I was reading some of the turned-in assignments from 2nd hour. There were a series of questions that they were answering as their own created fictional character. Question #2 asked, "What makes you laugh so hard that soda comes shooting out your nose?" A student in 2nd hour wrote: farts. This caused me to laugh out loud, which caused the students in 5th hour to ask what had made me laugh. So I told them. And then someone mentioned the time earlier in the year that the class clown had accidentally sneezed and farted at the same time for all to hear. I laughed 'til I cried just remembering the incident.

Playing volleyball for our 7th grade grade-level PLC meeting after school. Mike Hylton's ability to cover the entire court despite his slippery dress shoes. Jan's imitation of the quarter walk. Floyd's solid serving. Colette's skill! (I want to grow up to be as active as Colette when I'm her age.) My belly flop dive onto the floor -- glasses go flying.

Getting an afternoon nap.

Letting my outdoor dog into the house while I put my shoes on. Hubby and son are at the Father's and Son's campout, oldest daughter drove to a friends house for a party, and youngest daughter is at a neighbor's playing night games. Giving the dog a very small slice of banana bread.

Taking the dog for an evening stroll around the block. Enjoying the robins chirping and flitting about. Stopping to smell the last of the current berry blossoms on the Allred's bushes. Looking at the cute chalk drawings on the Higbee's driveway. The smell of Karma Lee's white lilacs. Heaven!


Friday, May 04, 2012

May the 4th Be With You . . . Cape Capers

In honor of May the 4th be with you . . . I brought my Sith Lord cape to school today. (It's really the witch cape I made a couple years ago.) I drew a student's name from the pit-of-despair each hour to determine who got to wear it.
In first hour it was Austin's birthday. He asked if he could wear it, because it was his birthday. I said, "Yes. If I draw your name." And then I drew his name. Really. And it was announced over the intercom for all the birthday people (Austin's name was read) to come to the principal's office for their birthday treat. So he went to the principal's office wearing the cape. Sigh.
We were already reading The Wednesday Wars when Austin returned, so it wasn't until after the quiz that we heard how it went in the principal's office.
Me:  Did the principal say anything about the cape?
Austin:  Yeah. He asked me why I was wearing it.
Me:  And you said?
Austin: I told him that I was trying to make my family proud.
Me:  That's it? That's all you told him.
Austin:  Yeah.
Me:  Austin! He's going to wonder which teacher sent a student to the office wearing a cape! And he'll look up your schedule and find out it was me. And he'll have no idea why I really sent you to his office wearing a cape. Aagh! I'd better call him and clear this up.
Me: (after dialing the principal's number) Hi, This is Mrs. Hansen. I understand you had a student in your office this morning wearing a cape.
Principal:  Yes, I did.
Me:  I thought you'd want to know that we're commemorating "May the 4th Be With You" by drawing students' names from the pit-of-despair and letting them wear my Sith Lord cape.
Principal:  A-ha. I did ask about it, but all I got was that he was trying to make his family proud.
Me:  Well, now you know the rest of the story!
Actually, it made for a pretty memorable May the 4th! I'd do it again in a heartbeat.

P.S. The principal came down during another hour to deliver something. My students were quietly reading The Wednesday Wars like model students. And he saw yet another student wearing the cape -- while being perfectly on-task!

Tuesday, May 01, 2012

Bliss on a Bike . . .

Today I enjoyed an activity that never fails to bring me happiness -- riding my bike with my dog running along on  leash. About a year ago I posted another post about it on my Belly Acre Farm blog.

There are a couple things about this activity that make it so enjoyable. The first is that I'm doing it with my dog. She's awesome! She wears a harness and pulls and pulls. My first stop today was at my pharmacy drive-up window. As they filled my prescriptions, I asked if they still give out dog treats. (I'd been in there a few months ago when another customer pulled in with a dog in their car and received a dog treat.) "Sure!" they said, and gave Annie a doggie biscuit. Annie seems to enjoy these bike rides almost as much as I do.

The second thing that great about these rides is that I get to ride a fun bike. It's a lot like this bike, but with a red seat, red handle bars, and a white metal basket on the front. And, yes, it has a bell!

My bike is a joy to ride because it has a wide, tractor-like seat. In other words, when I sit on the seat, you can still see it beneath my butt. And I don't have gluteus maximus pain for days afterwards either. Plus the basket and the bell are a kick! I can ride my bike to my local grocery store, buy two gallons of milk, and they will both fit in my basket for the return trip home. Oh, and the basket is easily detachable, so I can use it in the store like a mini-shopping basket and not even need plastic bags. Yeah!

I'm so glad that warmer weather is here so that I can get out on my bike with my dog more often!