Showing posts with label Recipe. Show all posts

Sunday, July 14, 2013

Homemade Doughnut (holes)

Hey! Natalie and Amanda here.

We got kind of bored today, and we were craving a treat, so we decided to make doughnuts. Which later just became doughnut holes. This is where we got the recipe.It was really delicious and the doughnuts turned out wonderfully!

You will need:

  • .25 oz active,dry yeast
  • 1/4 cup warm water 
  • 1 1/2 cups lukewarm milk
  • 1/2 cup white sugar
  • 1 tsp salt
  • 2 eggs
  • 1/3 cup shortening
  • 5 cups all-purpose flour
  • 1 quart vegetable oil for frying
If you choose to make your doughnuts with a glaze, here are the ingredients.
 (We just made ours with powdered sugar which we will explain later.)
  • 1/3 cup butter
  • 2 cups confectioners' sugar
  • 1 1/2 tsp vanilla
  • 4 tbsp hot water or as needed
Step 1
Weigh/measure the yeast

Step 2
Add it to the warm water, and let stand for 5 minutes, or until it's kind of foamy. We put our mixture outside on the front porch.


Step 3
In a large bow, mix together all the dough ingredients, including the yeast/water mix. Mix at low speed. We had to use a pastry blender to mix all the shortening in.

Step 4
Beat in the remaining flour (3 cups) 1/2 cup at a time, or until the dough no longer sticks to the bowl and is smooth/elastic.


Step 5
Put the dough into a greased bowl, place it somewhere warm, and let it rise. The actual recipe says to let it double in size, but ours wasn't going to ever double, so we just let it sit for 20 minutes, which worked out great.


Step 6
Put the dough on a slightly floured surface and roll out until it is about 1/2 inch in thickness.


Step 7
Cut the shapes of your doughnuts out. The recipe then says to let them double in size again, but Natalie and I didn't do this, and ours turned out great!


Step 8
Heat up the oil in a fryer or heavy skillet up to 350 degrees. Once it's heated up, begin to cook the doughnuts. 


Step 9
Make sure to turn them over so they are evenly brown (we recommend using tongs to turn them). When they're done, use the tongs to take them out, and put them on a plate covered in paper towels. 


Step 10
When the doughnuts are no longer steaming hot, roll them/dust them in powdered sugar if you would like. That's what we did, and they were great! Though we also discovered they were delicious if you put a little bit of peanut butter and raspberry jam on them. Or honey. Or cinnamon sugar. Again, if you just want a simple glaze, the instructions are here.

(this is when we sprinkled the powdered sugar on, it didn't work out too well)

(we recommend rolling it, because the sugar ended up sticking better to the doughnut holes)

And thanks to Khrys Bosland for the cute font used in the previous image!


Enjoy!

-Amanda and Natalie

Thursday, July 11, 2013

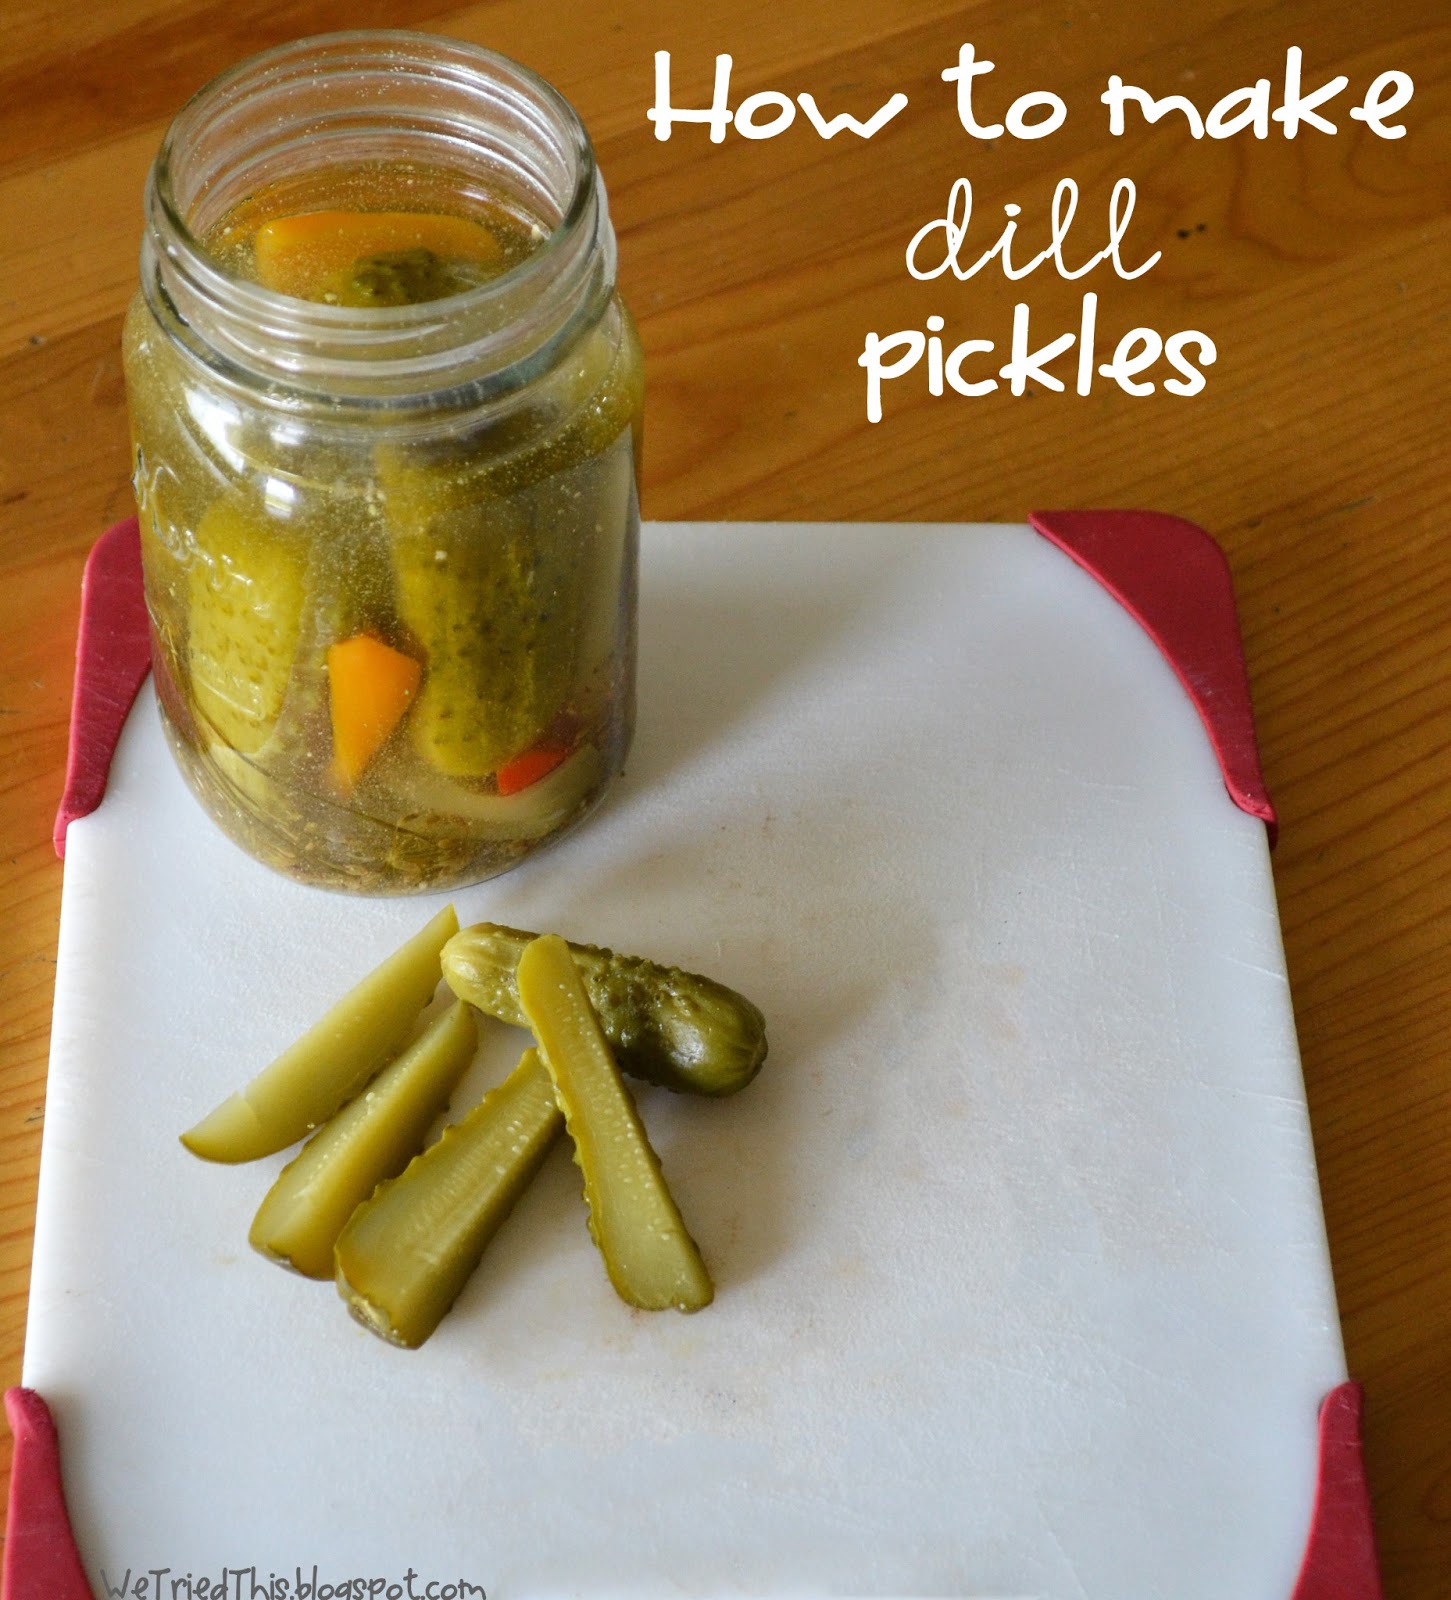
Dill Pickle Recipe -- a family favorite


I'll be the first to admit that I usually complain about canning season. That is, about everything except canning pickles. These are my favorite thing to can! Perhaps it's because I can do it in small batches, and it doesn't consume a whole day. Or perhaps it's because all the ingredients are fresh and home-grown.

I only use whole cucumbers for my pickles. I pick and store my baby cucumbers, up to a week, in plastic bags in the fridge -- UNWASHED -- until I have enough for a batch. (Washing them causes them not to store as well.) Also, if you're as addicted to canning pickles as I am, I suggest planting at least 3 hills of pickling cukes (we plant Pioneer Pickler). That way, when the cucumbers begin coming on, you can accumulate enough for a batch quickly. And, once you have canned enough pickles, you simple pull up the plants.

Happy pickling!


Dill Pickles

8 pounds cucumbers (I can whole cucumbers -- baby size. I think they stay crisper that way.)
1/2 c. sugar
1/2 c. canning salt (I don't know what canning salt is. I just use regular iodized table salt.)
1 quart vinegar (4 c.)
1 quart water (4 c.)
3 Tablespoons mixed pickling spices (in a tea diffuser or tied up in cheesecloth)
fresh or dried heads of dill -- 1 per jar
cayenne pepper or pieces of hot pepper
whole garlic cloves, peeled -- one per pint jar
ground mustard, fine

Wash cucumbers well; drain. Combine sugar, salt, vinegar and water in a large saucepot. Add spice bag to mixture; simmer 15 minutes. 

In clean pint jars place: head of dill, 1 clove garlic, 1/4 tsp. ground mustard, 1/2 inch piece of hot pepper (no seeds) or 1/8 tsp. cayenne pepper. Next, pack in clean, fresh cucumbers leaving 1/4-inch headspace.

Ladle hot liquid over cucumbers, leaving 1/4-inch headspace. Adjust 2-piece canning lids. (I like to soak my lids in just barely simmering water for 5 minutes before putting them on the jars.) 

Process pints and quarts 25 minutes in a boiling-water canner.

Note: After canning the pickles, allow 6 weeks before eating them so they'll reach their full flavor.


Monday, June 24, 2013

All-American Dessert: Patriotic Pie

Christie here, sharing my signature dessert for the first time on the internet.

Anytime is a great time to make a delicious raspberry pie, but when you add a few blueberries atop the whipped cream, you have an All-American Dessert perfect for the 4th of July!

Let's start with the crust.

You will need:

  • 1/4 c. cold water, (with 1 ice cube in it)
  • 1 egg
  • 1 tbsp. vinegar
  • 2 1/2 c. flour
  • 1 c. shortening
  • 1 tsp. salt


Crust - Step 1
(Preheat the oven to 400 degrees F.)

Add all the liquid ingredients together in a small bowl. Stir well with a fork. Let sit (must have the ice cube) while you gather the rest of the ingredients.


Crust - Step 2
In a medium-sized mixing bowl, add only 2 cups of the flour and the teaspoon of salt. Stir together. Then measure 1 cup of shortening and add to the flour mixture. You will be cutting the shortening into the flour mixture until the shortening pieces are about pea-size.

Note: I use my Kitchenaid mixer, but you can also use a pastry blender or two butter knives.

This is the bowl before cutting in the shortening.


This is the bowl when the shortening is in sufficiently small pieces.


Crust - Step 3
Remove the icecube from your wet ingredients and add the liquid to your flour/shortening bowl and stir together until just moist. DO NOT overmix! The secret to flaky pie crust lies in not over-working the dough.

Once the dough is hanging together, form into two, fist-sized balls. These will be your pie shells.


Crust - Step 4
When we were making the pie dough, we only added 2 cups of the 2 1/2 cups of flour that the recipe called for. That's because during the crust rolling-out process you want to USE PLENTY OF FLOUR. I like to roll out my crusts on a Tupperware plastic sheet, but the counter top works fine too. For each ball of dough I use approx. 1/2 cup of flour on my surface. Then I roll the dough ball around in the flour, and begin rolling it out with my rolling pin.

As I'm rolling, I sprinkle on more flour as needed, being careful not to allow the crust to stick to my rolling pin. (Yeah. There's nothing like weilding a rolling pin to make one feel like a real woman!)

There's not rush to rolling out the crust. Go slowly, rolling out the dough into a rough circle. I like to roll my crust until I can just read the lines of my Tupperware sheet through the crust -- that's when I know that I've rolled it thin enough.

If your crust doesn't cooperate, and sticks to everything, gather up all the dough, sprinkle more flour on your surface, and start that crust again. Note: I don't roll out a piece of dough more than twice. It's just too tough after that, so I start over from step one if roll-out number two goes kaput.


Crust - Step 5
Now comes the tricky part -- getting your dough from the rolling surface to your pie pan. I use a metal spatula and carefully go under the edges of my dough. Then I ever-so-carefully fold the crust in half, carefully using the spatula to lift the center of the crust off the surface without tearing. Once the crust is completely unstuck, I carefully lift it into my pie pan and then un-fold it.

I mend any tears in the dough by overlapping them and pressing them together. It's also important to firmly press the dough into the bottom and edges of the pie pan. As you can see in the picture below, I like a lot of crust to work with around the top, so I fold the dough under itself around the rim, pressing as I go. Once the dough is firmly pressed into the pan, and I've got plenty of dough around the top, I trip off the excess with a butter knife.


After fluting the edges, I poke holes in the crust with a fork, and place the crust in the freezer for at least 6 minutes. (This helps prevent shrinking when baking the crust.)


Crust - Step 6
Now you're ready to bake your pie crust. Place it on the center rack of an oven that's preheated to 400 degrees F. It bakes for approximately 15 minutes or until a light, golden brown. (Time varies depending your individual oven.)


Once the crust is done, remove it from the oven and let it cool completely.


Note: This recipe makes two generous 9" pie crusts. You'll also have some dough leftover. I like to scrunch in into a ball, put it in a sandwich bag, and freeze it to use later as the top of a chicken-pot-pie.


Once your pie shells are out of the oven, you can start working on the raspberry pie filling.

You will need:

  • 1, 3-oz. box of raspberry flavored gelatin
  • 1 c. sugar
  • 1/4 tsp. salt
  • 1/4 c. cornstarch (a tad more if fruit is from frozen)
  • 2 c. water (1 3/4 c. if fruit is frozen)
  • 2 Tbsp. lemon juice
  • 3 to 4 c. fresh raspberries / 4 c. frozen raspberries


Filling - Step 1
In a medium saucepan, add dry ingredients (gelatin, sugar, salt, cornstarch) and stir well.


Filling - Step 2
Next, add 2 cups of water if using fresh raspberries, or 1 3/4 cups of water if raspberries are frozen and two tablespoons of lemon juice.


Filling - Step 3
Cook mixture on medium-high heat, stirring constantly until it comes to a full boil. Remove from heat, and let filling cool slightly.


Filling - Step 4
If using fresh berries, let gelatin mixture cool for at least 30 minutes before adding berries. For frozen berries, let the gelatin mixture cool for 10 minutes or so, and add berries to the saucepan, stirring well.

Once berries are combined with gelatin mixture, divide the filling evenly into your two pie shells and refrigerate for approximately four hours.


Topping
Only real whipping cream for an all-American pie. 

Before whipping cream, place the bowl, beaters, and rubber scraper in the freezer for at least 5 minutes -- this makes for no-fail whipped cream every time!

In your chilled bowl, dump in a 1/2 pint (8 oz.) of heavy whipping cream and 1/2 cup of granulated sugar. Beat with chilled beaters on medium-high until the cream is stiff and forms peaks that are firm.

Divide whipped cream onto pies and garnish with fresh blueberries for a red, white, and blue dessert.

Note: You can make this pie with a variety of  fresh or frozen fruits. We also like:
strawberries and strawberry flavored gelatin
peaches and peach flavored gelatin.


Hope you enjoy it!


Thursday, June 20, 2013

Cheesy Vegetable Soup

 Christie writes:

Monday evenings are my nights to make dinner. I had almost an entire vegetable tray leftover from our Father's Day family get-together, and figured that I'd use the veggies to make a cheesy soup. Mind you I didn't have a cheesy vegetable soup recipe, so I did a little experimenting. It turned out YUMMY! All the kids even liked it. Here's how I did it . . .


Cheesy Vegetable Soup

3 c. water
3 tsp. chicken bouillion granules or 3 cubes chicken bouillon (optional -- I left this out of mine, and it tasted great.)
1 medium onion, chopped
2 whole stalks celery, chopped
1 sweet pepper or 2 small sweet pepper, chopped fine
12 to 15 baby carrots, chopped
broccoli florets, cut into small pieces
cauliflower, cut into small pieces
2 c. milk
1/3 c. butter
1/2 c. flour (scant)
2 to 3 c. grated cheddar cheese
1 tsp. salt

Directions:

Pour water in a large stock pan and bring to a boil, adding all the vegetables in the order given. (The veggies are listed in order of how long they take to cook. So, while you're cutting up the broccoli and cauliflower, it should give the onions, celery, and peppers plenty of time to get nice and soft.) Once all the vegetables are added and have cooked five minutes or so, start making the sauce.

In a seperate pan melt the butter over medium heat. Use a spongy-up-and-downer (that's what we called it growing up) and stir the flour into the butter, stirring and cooking for a couple minutes. Add the milk, stirring constantly, until the mixture begins to thicken. This will take a few minutes. Keep stirring!

Once the white sauce begins to thicken, add the salt and cheese, stirring until the cheese is melted. Add the cheese sauce to the large stock pot of vegetable, and stir until combined.

Turn off your stove, serve and enjoy!


Wednesday, June 19, 2013

Homeade Marshmallow Brownies

Hey everyone!
Amanda here.

Today I'm sharing one of my all-time favorite dessert recipes, Marshmallow Brownies!


 For the brownies you will need:

  • 1/3 C. Cocoa
  • 1 1/2 C. Flour
  • 2 C. Granulated Sugar
  • 2 tsp. Vanilla
  • 3/4 C. Butter (one stick and a half)
  • 1/4 tsp. Salt
  • 4 Eggs


For the frosting you will need:

  • 1/3 C. Cocoa Powder
  • 1 1/2 C. Powdered Sugar
  • 1 Stick of Butter (1/2 C)
  • 1/3 C. Evaporated Milk


And of course, marshmallows!


Let's get started!

Step 1
(Preheat your oven to 350)

Mix all of the brownie ingredients together...


...until it looks something like this.


Step 2
Spray a jelly pan with non-stick spray


Step 3
Pour the brownie dough onto the jelly pan and spread it evenly over the surface....


...until it looks something like this.


Step 4
Put the brownies in the oven at 350 for 20 minutes.

Step 5
When the brownies are done...


...put a bag (depending on the brand, it doesn't need a whole bag) of marshmallows on the brownies right after they are out of the oven. Keep the oven on (for now, anyway).


Put the brownies and marshmallows back in the oven for 3 minutes. Turn the oven off.


Step 6
Get the brownies out of the oven after 3 minutes. The marshmallows should be very puffy.


Step 7
After waiting a couple minutes for the marshmallows to cool, add the frosting/glaze.
The recipe for the frosting is pretty simple - add the ingredients listed above at the beginning of the post
-Mix all the ingredients together. Make sure the frosting isn't too thick.


When the frosting is done, pour it evenly on the brownies and spread it.


It should look something like this when it's done.

Next, just leave it to cool for a while, cut, and enjoy!

Here's a picture of the recipe- just to make it easier to print off and use!


Enjoy! (:


Sunday, June 09, 2013

Ice Cream Sandwiches; With a Waffle Iron and Cake Mix

We were experimenting in the kitchen tonight. With cake. And a waffle iron. We were making 3 2 1 cake, which turned out to be gross. Don't try it. Then, Natalie came up with the brilliant idea to make ice cream sandwiches with cake mix. So! Here are step-by-step instructions on how to make them - we'll give a review afterwards.

Step 1
Get some cake mix, any kind will do.
We used some cake mix Natalie received for her birthday. Just follow the directions that are on the box for ordinary cake. However, after we mixed the cake and made the first sandwich pieces, our cake tasted like eggs. So, we added cocoa and sugar to try and get rid of the egg taste. It ended up working for us!


Step 2
Heat up your waffle iron/maker. When it is heated up, pour the cake mix onto the hot plate.


Step 3
Once the cake mix is completely cooked (it needs to be a little bit crispy so it doesn't fall apart), take it out carefully (Natalie and I had to use 2 forks and a spatula) and let it cool.


Step 4
Break the waffle apart, we broke it into fourths, and put some ice cream on top of it.


Step 5
Eat it. 


Review
Natalie and I thought these were okay, but they weren't anything special. They were fun to make and experiment with, and we might make them again, but only out of summer boredom.


Comment below if you find any ways to make this treat better!