Monday, June 24, 2013

All-American Dessert: Patriotic Pie

Christie here, sharing my signature dessert for the first time on the internet.

Anytime is a great time to make a delicious raspberry pie, but when you add a few blueberries atop the whipped cream, you have an All-American Dessert perfect for the 4th of July!

Let's start with the crust.

You will need:

  • 1/4 c. cold water, (with 1 ice cube in it)
  • 1 egg
  • 1 tbsp. vinegar
  • 2 1/2 c. flour
  • 1 c. shortening
  • 1 tsp. salt


Crust - Step 1
(Preheat the oven to 400 degrees F.)

Add all the liquid ingredients together in a small bowl. Stir well with a fork. Let sit (must have the ice cube) while you gather the rest of the ingredients.


Crust - Step 2
In a medium-sized mixing bowl, add only 2 cups of the flour and the teaspoon of salt. Stir together. Then measure 1 cup of shortening and add to the flour mixture. You will be cutting the shortening into the flour mixture until the shortening pieces are about pea-size.

Note: I use my Kitchenaid mixer, but you can also use a pastry blender or two butter knives.

This is the bowl before cutting in the shortening.


This is the bowl when the shortening is in sufficiently small pieces.


Crust - Step 3
Remove the icecube from your wet ingredients and add the liquid to your flour/shortening bowl and stir together until just moist. DO NOT overmix! The secret to flaky pie crust lies in not over-working the dough.

Once the dough is hanging together, form into two, fist-sized balls. These will be your pie shells.


Crust - Step 4
When we were making the pie dough, we only added 2 cups of the 2 1/2 cups of flour that the recipe called for. That's because during the crust rolling-out process you want to USE PLENTY OF FLOUR. I like to roll out my crusts on a Tupperware plastic sheet, but the counter top works fine too. For each ball of dough I use approx. 1/2 cup of flour on my surface. Then I roll the dough ball around in the flour, and begin rolling it out with my rolling pin.

As I'm rolling, I sprinkle on more flour as needed, being careful not to allow the crust to stick to my rolling pin. (Yeah. There's nothing like weilding a rolling pin to make one feel like a real woman!)

There's not rush to rolling out the crust. Go slowly, rolling out the dough into a rough circle. I like to roll my crust until I can just read the lines of my Tupperware sheet through the crust -- that's when I know that I've rolled it thin enough.

If your crust doesn't cooperate, and sticks to everything, gather up all the dough, sprinkle more flour on your surface, and start that crust again. Note: I don't roll out a piece of dough more than twice. It's just too tough after that, so I start over from step one if roll-out number two goes kaput.


Crust - Step 5
Now comes the tricky part -- getting your dough from the rolling surface to your pie pan. I use a metal spatula and carefully go under the edges of my dough. Then I ever-so-carefully fold the crust in half, carefully using the spatula to lift the center of the crust off the surface without tearing. Once the crust is completely unstuck, I carefully lift it into my pie pan and then un-fold it.

I mend any tears in the dough by overlapping them and pressing them together. It's also important to firmly press the dough into the bottom and edges of the pie pan. As you can see in the picture below, I like a lot of crust to work with around the top, so I fold the dough under itself around the rim, pressing as I go. Once the dough is firmly pressed into the pan, and I've got plenty of dough around the top, I trip off the excess with a butter knife.


After fluting the edges, I poke holes in the crust with a fork, and place the crust in the freezer for at least 6 minutes. (This helps prevent shrinking when baking the crust.)


Crust - Step 6
Now you're ready to bake your pie crust. Place it on the center rack of an oven that's preheated to 400 degrees F. It bakes for approximately 15 minutes or until a light, golden brown. (Time varies depending your individual oven.)


Once the crust is done, remove it from the oven and let it cool completely.


Note: This recipe makes two generous 9" pie crusts. You'll also have some dough leftover. I like to scrunch in into a ball, put it in a sandwich bag, and freeze it to use later as the top of a chicken-pot-pie.


Once your pie shells are out of the oven, you can start working on the raspberry pie filling.

You will need:

  • 1, 3-oz. box of raspberry flavored gelatin
  • 1 c. sugar
  • 1/4 tsp. salt
  • 1/4 c. cornstarch (a tad more if fruit is from frozen)
  • 2 c. water (1 3/4 c. if fruit is frozen)
  • 2 Tbsp. lemon juice
  • 3 to 4 c. fresh raspberries / 4 c. frozen raspberries


Filling - Step 1
In a medium saucepan, add dry ingredients (gelatin, sugar, salt, cornstarch) and stir well.


Filling - Step 2
Next, add 2 cups of water if using fresh raspberries, or 1 3/4 cups of water if raspberries are frozen and two tablespoons of lemon juice.


Filling - Step 3
Cook mixture on medium-high heat, stirring constantly until it comes to a full boil. Remove from heat, and let filling cool slightly.


Filling - Step 4
If using fresh berries, let gelatin mixture cool for at least 30 minutes before adding berries. For frozen berries, let the gelatin mixture cool for 10 minutes or so, and add berries to the saucepan, stirring well.

Once berries are combined with gelatin mixture, divide the filling evenly into your two pie shells and refrigerate for approximately four hours.


Topping
Only real whipping cream for an all-American pie. 

Before whipping cream, place the bowl, beaters, and rubber scraper in the freezer for at least 5 minutes -- this makes for no-fail whipped cream every time!

In your chilled bowl, dump in a 1/2 pint (8 oz.) of heavy whipping cream and 1/2 cup of granulated sugar. Beat with chilled beaters on medium-high until the cream is stiff and forms peaks that are firm.

Divide whipped cream onto pies and garnish with fresh blueberries for a red, white, and blue dessert.

Note: You can make this pie with a variety of  fresh or frozen fruits. We also like:
strawberries and strawberry flavored gelatin
peaches and peach flavored gelatin.


Hope you enjoy it!


Saturday, June 22, 2013

Benefits and Uses of Coconut Oil


Hi, Natalie here.

Today's post is going to be about coconut oil!  I recently bought some EfaGold Coconut Oil.  And let me say, I LOVE it!!  It's not particularly cheap, but for the amount you get, it's a pretty good deal.  Especially because it should last a long time, too.  I found this great website with 122 uses for coconut oil!  Check it out!  I'm going to share just a few of my favorite ways to use this amazing stuff.

1.  On your face- Some days this is all I use on my face.  Nothing else!  You may think, cleansing my skin with oil?!  Won't that make my skin worse?  Oil is actually a great way to clean your skin!  It can clear blemishes, fade scars, moisturize, remove make-up, and it makes your face su-u-u-per soft, and glowy!

I like to use coconut oil to exfoliate my skin, and it's super easy and fast to make. All you have to do is mix 1/2 cup of oil with 1/4 cup of baking soda!

In the past I've used Castor Oil to wash my face, and it's worked pretty well.  So if you have that or any other oil, you could mix it with the coconut oil.  Before I put the coconut oil on my face, I splash warm water on my face to open my pores.  Then massage the oil on your skin for a few minutes.  After that, cover your face with a warm wash cloth; take if off once it's cooled down. Then wash it off and moisturize! (If needed).

To moisturize with coconut oil pretty straight forward, just apply a thin layer to your entire face.  Lips, eyebrows, and eyelashes included!


Another great way to use coconut oil is as a body scrub!  Afterwards you'll smell like coconut!  And not like artificial coconut, but real coconut.  In my scrub I used peppermint, vanilla, and sugar.  But you can add salt or brown sugar and any essential oil if you choose to use one.  I just estimated how much sugar I wanted to add, but a guideline is 1 part oil to 2 parts sugar or salt.  I use mine in the shower and afterwards, you will smell SO good!! Plus your skin will feel baby soft.

Besides using in on your face and body, you can use coconut oil on your hair.  The oil actually penetrates the hair shaft, not just coating it.

Before applying the oil to your hair, melt some of it by placing it in warm water.
Once some of it is melted, just put it all over your hair.  I combed it through to evenly distribute it, then wrapped my head in a warm towel.  You can leave it in 30 minutes to hours!  Leaving it in overnight nourishes your hair best, but be careful not to apply to much and to thoroughly wash it out.  I didn't, and my hair looked pretty greasy, so I put in some dry shampoo.  If you have cornstarch, that will work too because it's absorbent. You can add essential oil to the coconut oil if you want, but I didn't.


     To promote growth
Peppermint, Lavender, Rosemary, Basil, and (Clary) sage.
Oily Hair
Tea Tree oil, Lemon, Basil and Rosemary.
Dry Hair
Peppermint, Olive, and Myrrh.
Dandruff
Tea Tree, Aloe Vera, Chamomile, and Eucalyptus.

Lastly I use coconut oil for eating!  I used organic, pure, cold pressed coconut oil.  If you don't, it's not going to taste and smell like coconut as I learned.  I bought Spectrum coconut oil because it was cheap and looked like what I wanted. It wasn't. Whoops. . .  Coconut oil is actually very good for you. (If taken in proper amounts.)  It's also good for cooking, and for. . . animals!  I fed some to the cats and they loved it! Maybe it'll help Oreo (the black one) lose some weight. . .

Hopefully if you have some coconut oil sitting unused you found some new ways to use it!  If you try any of the above uses, tell me how they worked out for you.  Good luck!  Comment your favorite ways to use coconut oil!


Thursday, June 20, 2013

Cheesy Vegetable Soup

 Christie writes:

Monday evenings are my nights to make dinner. I had almost an entire vegetable tray leftover from our Father's Day family get-together, and figured that I'd use the veggies to make a cheesy soup. Mind you I didn't have a cheesy vegetable soup recipe, so I did a little experimenting. It turned out YUMMY! All the kids even liked it. Here's how I did it . . .


Cheesy Vegetable Soup

3 c. water
3 tsp. chicken bouillion granules or 3 cubes chicken bouillon (optional -- I left this out of mine, and it tasted great.)
1 medium onion, chopped
2 whole stalks celery, chopped
1 sweet pepper or 2 small sweet pepper, chopped fine
12 to 15 baby carrots, chopped
broccoli florets, cut into small pieces
cauliflower, cut into small pieces
2 c. milk
1/3 c. butter
1/2 c. flour (scant)
2 to 3 c. grated cheddar cheese
1 tsp. salt

Directions:

Pour water in a large stock pan and bring to a boil, adding all the vegetables in the order given. (The veggies are listed in order of how long they take to cook. So, while you're cutting up the broccoli and cauliflower, it should give the onions, celery, and peppers plenty of time to get nice and soft.) Once all the vegetables are added and have cooked five minutes or so, start making the sauce.

In a seperate pan melt the butter over medium heat. Use a spongy-up-and-downer (that's what we called it growing up) and stir the flour into the butter, stirring and cooking for a couple minutes. Add the milk, stirring constantly, until the mixture begins to thicken. This will take a few minutes. Keep stirring!

Once the white sauce begins to thicken, add the salt and cheese, stirring until the cheese is melted. Add the cheese sauce to the large stock pot of vegetable, and stir until combined.

Turn off your stove, serve and enjoy!


Wednesday, June 19, 2013

Homeade Marshmallow Brownies

Hey everyone!
Amanda here.

Today I'm sharing one of my all-time favorite dessert recipes, Marshmallow Brownies!


 For the brownies you will need:

  • 1/3 C. Cocoa
  • 1 1/2 C. Flour
  • 2 C. Granulated Sugar
  • 2 tsp. Vanilla
  • 3/4 C. Butter (one stick and a half)
  • 1/4 tsp. Salt
  • 4 Eggs


For the frosting you will need:

  • 1/3 C. Cocoa Powder
  • 1 1/2 C. Powdered Sugar
  • 1 Stick of Butter (1/2 C)
  • 1/3 C. Evaporated Milk


And of course, marshmallows!


Let's get started!

Step 1
(Preheat your oven to 350)

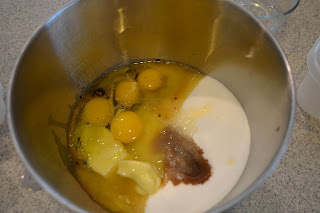
Mix all of the brownie ingredients together...


...until it looks something like this.


Step 2
Spray a jelly pan with non-stick spray


Step 3
Pour the brownie dough onto the jelly pan and spread it evenly over the surface....


...until it looks something like this.


Step 4
Put the brownies in the oven at 350 for 20 minutes.

Step 5
When the brownies are done...


...put a bag (depending on the brand, it doesn't need a whole bag) of marshmallows on the brownies right after they are out of the oven. Keep the oven on (for now, anyway).


Put the brownies and marshmallows back in the oven for 3 minutes. Turn the oven off.


Step 6
Get the brownies out of the oven after 3 minutes. The marshmallows should be very puffy.


Step 7
After waiting a couple minutes for the marshmallows to cool, add the frosting/glaze.
The recipe for the frosting is pretty simple - add the ingredients listed above at the beginning of the post
-Mix all the ingredients together. Make sure the frosting isn't too thick.


When the frosting is done, pour it evenly on the brownies and spread it.


It should look something like this when it's done.

Next, just leave it to cool for a while, cut, and enjoy!

Here's a picture of the recipe- just to make it easier to print off and use!


Enjoy! (:


Monday, June 17, 2013

2 Loads of laundry -- no soap!

Yup. I had a mental moment.

I'm blaming it on the blog post that consumed most of my morning. That, and having a fairly new washer that has a fancy-pantsy steam clean function that I tried for only the second time this morning.

So there I was, trying to get the socks and underwear load really, really clean and sanitized, and I run the batch without soap. Which I didn't realize until over 2 hours later. That's right -- the steam/sanitize function takes TONS of TIME -- over 2 hours! And for some reason as it was running, the machine experienced a blip that caused it to stop and display an error message. So I go into the laundry room, irritated to be drawn away from the day's important blog post, and figure that it's just easier to start the batch over on the regular cycle that only takes 40 minutes.

Not until that cycle finished and I was transfering the wet socks to the dryer did I realize that neither batch had detergent in it.

Yup. I ran two batches of laundry (2 cycles) without a lick of detergent.

Must be Monday.

DIY Cute Hanging Make-up Storage


Christie writes:

Above is the purple hanging storage piece that inspired this entire project. Notice that I didn't say it was cute. That's because it belonged to Amanda and hung in her closet in her room that is yellow and gray. And it's definitely purple. Which clashes with yellow and gray. Amanda just couldn't take the purple anymore and asked if I could make something similiar to the purple piece but in bedroom-matching colors. It looked easy enough, so I said YES. 

I'm happy to report that I did it! It worked. It turned out. It's even cute. (It's posted at the bottom of this entry.) But it wasn't super easy. If you're new to sewing, this is not the project for you. Experienced seamstresses only. (BTW, how do you correctly refer to a male who sews? Is he a seamster? Leave your thoughts in the comments.)

Here are the fabrics that we used for this project. I used about 1/3 yard of the gray fabric to make continuous double-fold bias tape by hand. I'll post a future how-to on that, but would recommend that you not make your own double-fold bias tape. (It took a lot of time, and it's fairly cheap to purchase.)

The main section of the project is double sided. Each unsewn piece was 24" wide by 43" long. If you use the same fabric front and back, you'll need 1 1/3 yards of fabric. Using two different fabrics, you'll need 2/3 of a yard of each fabric.

I used a yellow plaid flannel for the back, thinking it would be a nice soft surface to have hanging against the inside of Amanda's closet door. (No scratching off of paint.)


Next you'll need some clear vinyl. I purchased mine a few years ago when I was re-doing the seat cushions on our outdoor patio chairs. You can usually find it at a fabric store and can purchase it by the foot. (You'll need two feet of it.) My vinyl was 54" wide. If you'd like to save money and have recently purchased a new bedspread or blanket, you can use the clear vinyl from a couple bedding bags.

Cut six vinyl strips that are 3 1/2" tall and 24" wide. These are for the top six rows. I made the bottom row pockets a bit deeper. I suggest cutting two of them that are 6" tall and 24" wide.

Once you have your double-fold bias tape, your fabric measured and cut, and a total of 8 vinyl strips, you're ready to get started.


 Step 1) Sew the bias tape along the top if each strip of vinyl using coordinating thread in a straight stitch. The vinyl is sandwiched between the folds of the bias tape.This step gives the finished product a crisp and durable edge for the pockets.


Step 2) Once you have sewn bias tape along the tops of each strip of vinyl, you're ready to start sewing the strips of vinyl to the front fabric piece -- right-side up. (See photos above.)

Start with the bottom pocket (6" tall) by carefully pinning it in place, aligning your pins vertically in the seam allowance so that you're not creating any holes in the vinyl that can be seen once the project is finished.

I sewed the vinly strips to the front fabric along the bottom of each vinyl strip 1/8" in from the bottom of the vinyl using a straight stitch in thread that coordinated with the front fabric (yellow). Once I'd sewn the bottom of the piece of vinyl, I'd also tack the top edge of the vinyl to the front fabric in the seam allowance on each side. I found that this helped to hold the vinyl in place better than just the bottom seam.

I left about 1/2" betweent the top and bottom of each row.

This step if the most difficult one of the entire project. Go slowy. Be patient. As you progress upward, sewing the vinyl strips onto the front fabric, you will probably need to roll the right-hand side of the project as you continue sewing the vinyl strips on. After a few rows, you will want to sew the vinyl strips on with the top part of the project on the right -- like I'm doing in the bottom photo above.


Step 3) I'm a perfectionist, so at this stage of the project I found it helpful to remind myself that it was okay if each row of vinyl wasn't perfectly aligned. Mine looked a little wavy at this point. I simply told myself that since it would be haning on the back of a closet door, it didn't need to be perfect, and I took a few deep breathes.

Now for the easiest part. Decide how many loops you want to hang your project by. I decided three loops would be good. Four would also work nicely. Multiply how many loops you'll use by 4 (inches). Now cut that many inches of the double-folded bias tape and sew a straight seam down the open side as close to the edge as you can. (I skipped sewing my bias tape closed, and it's niggling at me.)

Now cut 4" lengths of the sewn bias tape for each loop. Decide where to place your loops at the top of the front piece, and pin the loop to the front side of the fabric like the photo above.


Step 4) The end is in sight. Stay with me. For this step you'll be arranging the project with the front and back fabric pieces right-sides together. I laid the front piece on my table with the vinyl side up, and then draped the back piece over it, wrong-side up. Next, I pinned the two pieces together. Pay particular attention as you pin the sides and bottom, as you don't want to create holes in the vinyl that will be seen. I pinned between the vinyl rows on the sides, and horizontally in the seam allowance on the bottom.

You can round your corners at this point. I used a saucer from the kitchen to trace a nice rounded edge, and then cut off the excess. You can also decide to keep the corners square.

IMPORTANT: Mark off an 8" opening that will NOT be sewn along one of the sides. This is how you will turn your project right-side-out once you've sewn it together.

Carefully sew around the edges of the project in a straight stitch leaving a standard 5/8" seam allowance. Be sure to leave an 8" opening on one side. Once I sewed around the edges, I trimmed the edge leaving just over 1/4" of fabric/vinyl. Note: DO NOT trim the fabric/vinyl at the 8" opening.

Now you're ready to turn the project right-side-out using the 8" opening. At this point it's important to reach inside and firmly press outward on the seam -- especially at the corners. After doing this, I folded in the seam allowance at the 8" opening and sewed it closed close to the edge and continued sewing carefully around the entire edge of the project.


Step 5) It's time to use a dry-erase marker and make the vertical lines for the pockets. Be sure not to mark on the fabric or thread -- just the vinyl. We left the middle of the bottom row unmarked so that it would create a nice big pocket.

Once you have the lines marked, sew straight seams just to one side of the dry-erase line. (Note: If you sew right on top of the dry-erase line, it won't perfectly erase. Oops. I found out the hard way.)

The sewing segment of the project is done!


We hung our project using Command hooks, being careful to follow the directions on the package exactly.


Viola! There it hangs in all its glory. Whew!